
制作詞雲圖是數據視覺化中一種獨特而引人註目的方式,能夠直觀展示文本數據的關鍵詞分布。本文將從基礎到高級,詳細探討如何利用 Python 制作詞雲圖,提供豐富的範例程式碼和全面的內容,幫助大家在不同場景下靈活運用這一技術。
安裝詞雲庫
首先,確保安裝 wordcloud 庫,可透過執行以下命令進行安裝:
pip install wordcloud
基礎範例:生成簡單詞雲圖
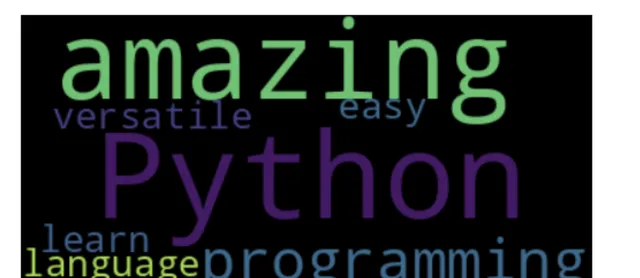
透過以下簡單範例,建立了一個基本的詞雲圖,展示了文本中的關鍵詞分布:
from wordcloud import WordCloudimport matplotlib.pyplot as plttext = "Python is an amazing programming language. It is versatile and easy to learn."wordcloud = WordCloud().generate(text)plt.imshow(wordcloud, interpolation='bilinear')plt.axis("off")plt.show()
自訂詞雲圖樣式
透過自訂參數,可以調整詞雲圖的外觀,包括背景顏色、最大詞匯量、輪廓線寬度和顏色:
wordcloud = WordCloud( background_color='white', max_words=50, contour_width=3, contour_color='steelblue').generate(text)
從檔生成詞雲圖
將文本數據保存在檔中,然後透過以下程式碼從檔生成詞雲圖:
with open('sample_text.txt', 'r', encoding='utf-8') as file: text = file.read()wordcloud = WordCloud().generate(text)
結合圖片生成自訂形狀詞雲圖
透過結合圖片,可以按照自訂形狀生成詞雲圖。首先,載入圖片作為形狀掩碼:
mask = np.array(Image.open("cloud_shape.png"))
然後,使用該形狀掩碼生成詞雲圖:
wordcloud = WordCloud( background_color='white', mask=mask, contour_width=3, contour_color='steelblue').generate(text)
結合 NLP 進行文本預處理
在制作詞雲圖之前,進行文本預處理可以提高視覺化效果。使用 Natural Language Processing(NLP)技術進行文本標記、分詞和停用詞過濾:
from wordcloud import WordCloud, STOPWORDSimport matplotlib.pyplot as pltimport nltkfrom nltk.corpus import stopwordsfrom nltk.tokenize import word_tokenizenltk.download('punkt')nltk.download('stopwords')# ... (見完整程式碼)wordcloud = WordCloud().generate(processed_text)
結合資料來源制作動態詞雲
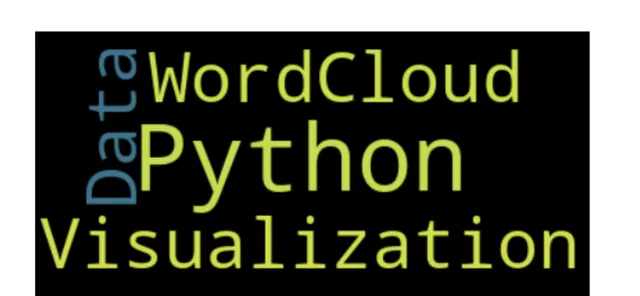
為了更生動地展示數據,可以結合即時資料來源生成動態詞雲圖。
以下是一個簡單的例項,使用 matplotlib.animation 模組實作動態效果:
from wordcloud import WordCloudimport matplotlib.pyplot as pltimport matplotlib.animation as animationimport random# 假設 words_list 是即時更新的關鍵詞列表words_list = ["Python", "Data", "Visualization", "WordCloud"]def update(frame): global words_list random.shuffle(words_list) text = " ".join(words_list) wordcloud = WordCloud().generate(text) plt.imshow(wordcloud, interpolation='bilinear') plt.axis("off") plt.pause(0.001)fig, ax = plt.subplots()ani = animation.FuncAnimation(fig, update, interval=2000, blit=False)plt.show()
制作多語言詞雲
對於包含多語言文本的場景,可以使用支持多語言的字型和語言標識。首先,確保字型檔支持多語言:
font_path = "path/to/multi_language_font.ttf"wordcloud = WordCloud(font_path=font_path, language='en').generate(text)
制作帶有顏色的詞雲
為詞雲添加顏色可以透過 ImageColorGenerator 類實作。首先,生成彩色詞雲圖:
from wordcloud import WordCloud, STOPWORDS, ImageColorGeneratorwordcloud = WordCloud().generate(text)
然後,使用顏色影像生成器根據影像的顏色為詞雲上色:
mask = np.array(Image.open("color_mask.png"))image_colors = ImageColorGenerator(mask)wordcloud.recolor(color_func=image_colors)
制作詞雲圖的互動式版本
透過使用 plotly 庫,我們可以制作互動式的詞雲圖。
以下是一個簡單的例子:
import plotly.express as pxfrom wordcloud import WordCloudtext = "Python is amazing. It is versatile and easy to learn."wordcloud = WordCloud().generate(text)fig = px.imshow(wordcloud.to_array(), binary_string=True)fig.update_layout(coloraxis_showscale=False)fig.show()

結合機器學習情感分析生成情感詞雲
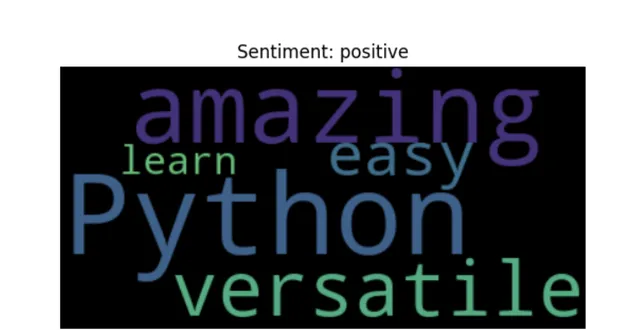
透過結合機器學習的情感分析結果,可以生成展示文本情感的詞雲圖:
from wordcloud import WordCloudimport matplotlib.pyplot as pltfrom textblob import TextBlobtext = "Python is amazing. It is versatile and easy to learn."# 假設 text 是待分析的文本blob = TextBlob(text)sentiment = "positive" if blob.sentiment.polarity > 0 else "negative"wordcloud = WordCloud().generate(text)plt.imshow(wordcloud, interpolation='bilinear')plt.title(f"Sentiment: {sentiment}")plt.axis("off")plt.show()
總結
在本文中,詳細探討了從基礎到高級的 Python 詞雲圖制作技術。從安裝詞雲庫開始,逐步介紹了基礎範例、自訂樣式、檔匯入、自訂形狀、NLP 文本預處理等基本概念。然後,深入研究了動態詞雲的制作,結合了即時資料來源和動畫模組,使詞雲更具生動感。隨後,展示了如何制作多語言詞雲,涉及選擇支持多語言的字型和語言標識。在顏色方面,演示了如何為詞雲添加顏色,以及使用互動式庫 plotly 制作互動式版本的詞雲圖。最後,展示了如何結合機器學習情感分析生成帶有情感標簽的詞雲。
這些範例旨在幫助大家全面了解詞雲圖制作的各個層面,並在實際計畫中靈活套用這一強大的數據視覺化技術。無論是初學者還是有經驗的 Python 開發者,透過本文的指南,都可以在詞雲圖制作中獲得更深入的見解。


